In this course you will learn the fundamentals of photography and how to apply your own vision to your pictures. The course will progress through the following units:
Fundamentals - Camera settings, exposure theory, file storage and management, simple editing and options for display
Framing - Emphasizing elements in the picture, exaggeration, guiding the viewers eye.
Styles - From landscape to portrait photography, macro to architecture, product to fine art and all points in-between.
Available Light - Use of natural or artificial light to highlight subjects in the frame. Use of simple modifiers to highlight.
Flash/Strobe Photography - Use of artificial light in the form of studio strobes and on and off camera flash to create different effects.
Light Modifiers - Use of softboxes, umbrellas, v-flats, grids, reflectors, gels and snoots to shape light.
Set Dressing/posing - How to prepare your subject for best presentation photographically.
Promotion - Create your own look and identity to showcase your photography and differentiate yourself from others.
Note: All photography assignments will be completed on OKM property except when a field study has been organized, we will then go as a group to fulfill that assignment.
Assessment:
As this is a visual, creative medium you will showcase your work in a webpage that will be updated continually throughout the course. As projects are assigned, you will create new pages and curate your best work for display. All assignments are found below in chronological order from top to bottom, with a description and requirements clearly listed. You will be assessed periodically throughout the course at regular intervals and your work will be viewed holistically (as a complete portfolio) as well as individually based on completion and the criteria for the specific shot. The overall assessment tool will be co-created with the class and will be posted on this website below this description, the criteria for each individual assignment will be listed in the project descriptions below.
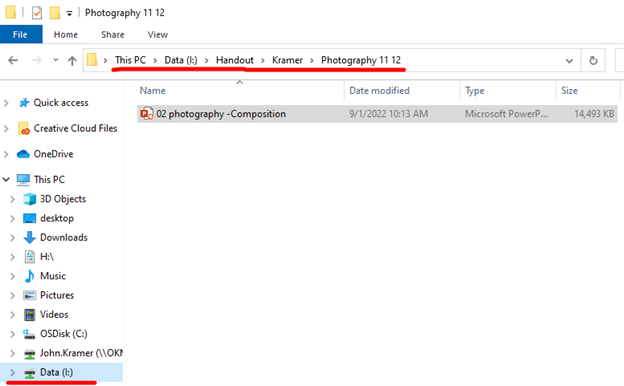
You can access all of the presentations in file explorer here:
Assignments:
01 - Set-Up Webpage:
You will create your own website to showcase your portfolio. Using Weebly: weebly.com you will sign-up with a personal email (do not use a school email as this will be de-activated when you graduate), and create a blank site. Once your site is created, you will create a title of your name. Next, you will take a picture within the class to set as your header picture(don't worry, we will change this one eventually). You will create the following pages with buttons to navigate to them:
Framing
Elements
Landscape
Nature
Macro
Once you have completed this, copy the url of your website and email it to: [email protected] with your name in the subject line of the email.
02 - Framing:
This is your first photographic assignment! For this you will create images using your own cellphone camera to demonstrate the different framing techniques that are listed below. When you have completed taking these pictures, upload to your desktop, edit simply to taste and then post them on the Framing page of the website that you made last class, and title each one appropriately. Below is the list of required shots:
Rule of Thirds
Leading Lines
Diagonals
Framing
Figure to ground
Fill the frame
Centre the dominant eye
Patterns and Repetition
Symmetry/Asymmetry
03 - Portrait and About Us:
Working with a partner, take a portrait of yourself using one extra flashlight from the other phone to highlight the side of their face.
Create a new page on your site called: "About Us", create a button to that page on the front page of your site.
Load your portrait onto that page, and write up a paragraph about why you have taken photography and what subject you really want to focus on in your work.
04 - Intro to Macro and Photoshop:
This assignment will introduce macro work along with an introduction to photoshop editing techniques. You will need to set your phone up to store RAW files (this is usually only an option when using the pro setting on your phone). You will need to take images of the following subject matter:
Text
Electronics
Crumpled Paper
Subject in front of xmas lights
Subject on a cd
Subject in pom poms
After you have taken your pictures, email them to yourself and open them in your computer.
Next you will make the following edits of each photo in the - Camera Raw Filter
Crop to 4:5
Tint
Temp
Exposure
Contrast
Highlights
Shadows
Whites
Blacks
Texture
Clarity
Dehaze
You may also want to work in the detail, color grading and effects tabs. If you really want to let loose, use the masking tool to affect the localized adjustments of your images even more.
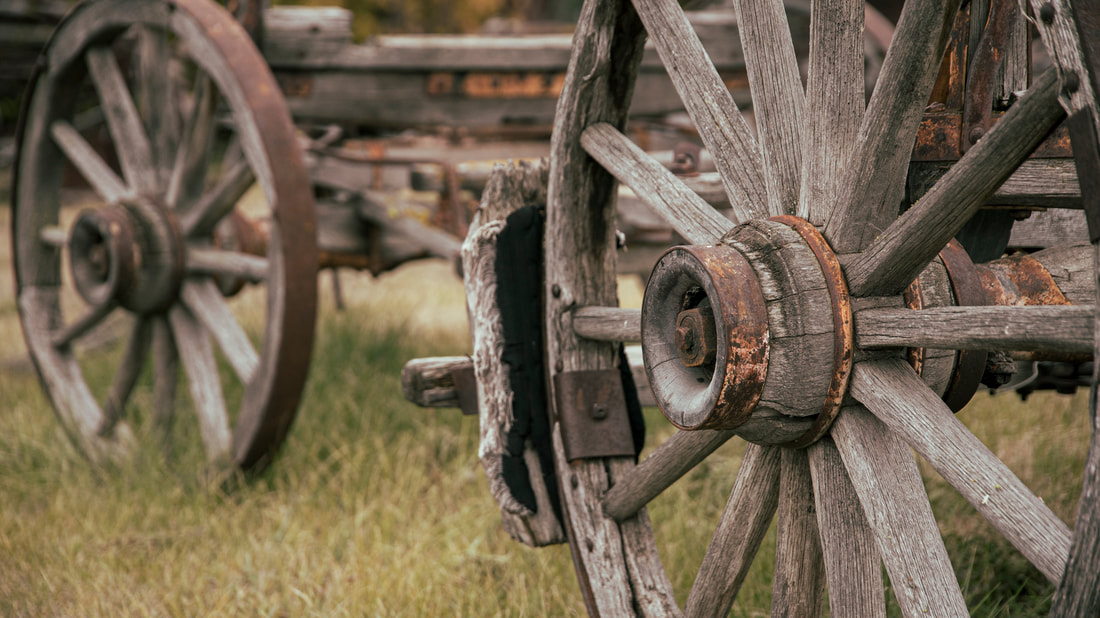
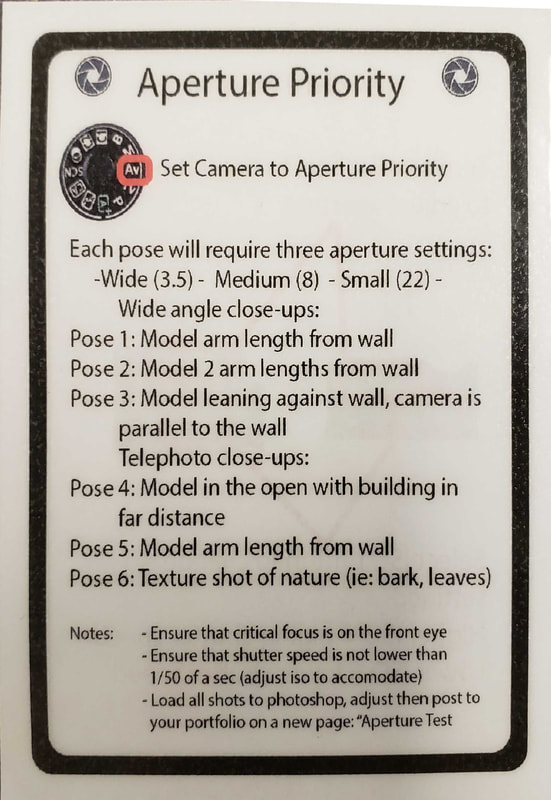
05 - Aperture Priority:
In this assignment we will be using DSLRs and setting them to aperture priority mode. Follow the instructions on the following Assignment card:
Each pose will require three different aperture settings: 3.5, 8 and 22 (Note: when zoomed in your lenses may only be able to go to 5.6 instead of 3.5)
You will have a total of 18 pictures, though you will likely take many more as you compose your shots.
Use the school as a backdrop for all photos
Make sure that your camera is set to record RAW and JPG pictures
Take all shots as 1/4 profile shots (head and shoulders, so get in close to the subject)
06 - Architecture:
At OKM we have the benefit of learning in a building that has been renovated and added on to multiple times. Due to these renovations, each section of the school has it's own unique look and texture. Your photography assignment is to document the school from different angles, capturing the texture and feel of the hallways and exterior. You should be looking for the following shots:
Long shot of hallway
Exterior of entrance or gymnasium
Modular section exterior
New construction for the daycare (stay outside of the fence, use the fence for framing or shoot through an opening)
Find an area that looks neglected, has detritus around. Can you frame that to look interesting or highlight the sense of neglect?
Interior social space (dress the set: organize tables and chairs and frame the shot in a way to make the area seem inviting and ready to be used)
Repetitive details (see if you can create abstract images using repetitive materials in the building)
Staircases
People walking in the hallway (make sure that no faces are visible).
Things to keep in mind:
Fill the frame, don't include unnecessary elements in your composition
How do you frame the shot? Straight on and flat or can you move on an angle to create diagonals?
How will the viewer's eye be drawn in to your image?
Pretend that you have been given a contract by the school to take images for a brochure to encourage parents to send their students to OKM. What shots will give an idea about what the school has to offer, and what shots show the school to be a desirable place to go to school?
For the neglected areas, pretend you are taking images for a newspaper that is doing a story on lack of funding in the school system. What images would project the idea that the school is neglected?
When complete, upload your images to your computer, edit to 16:9 and save as normal. You will need to add a new page to your portfolio which will be titled Architecture. Make edits in photoshop and then upload your photos with the exif data to your website.
Having worked with Aperture priority and Exposure Compensation, it is now time to work with shutter speed priority. With this setting on your camera you will take control of the shutter speed, and the camera will figure out an appropriate ISO value and Aperture. You will need to select the shutter speed to accomplish the following shots successfully:
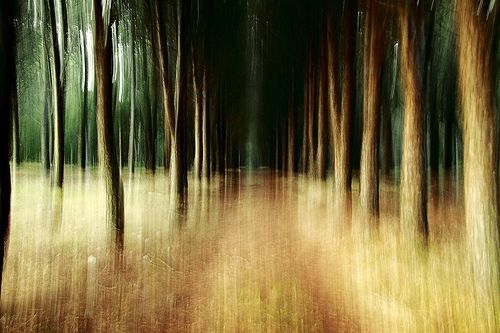
Intentional camera movement (horizontal and vertical)
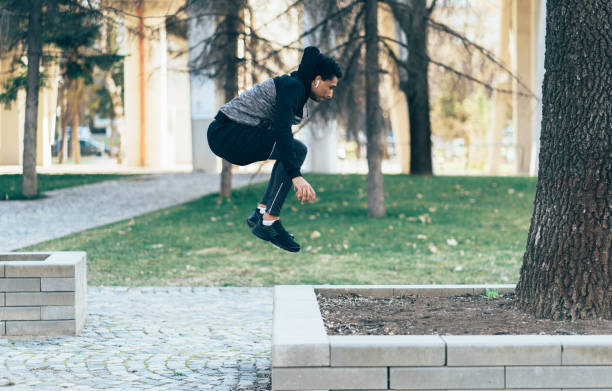
Freeze running motion (have your partner run and jump while taking pictures of them freezing the action, what is the slowest shutter speed that has no blur?
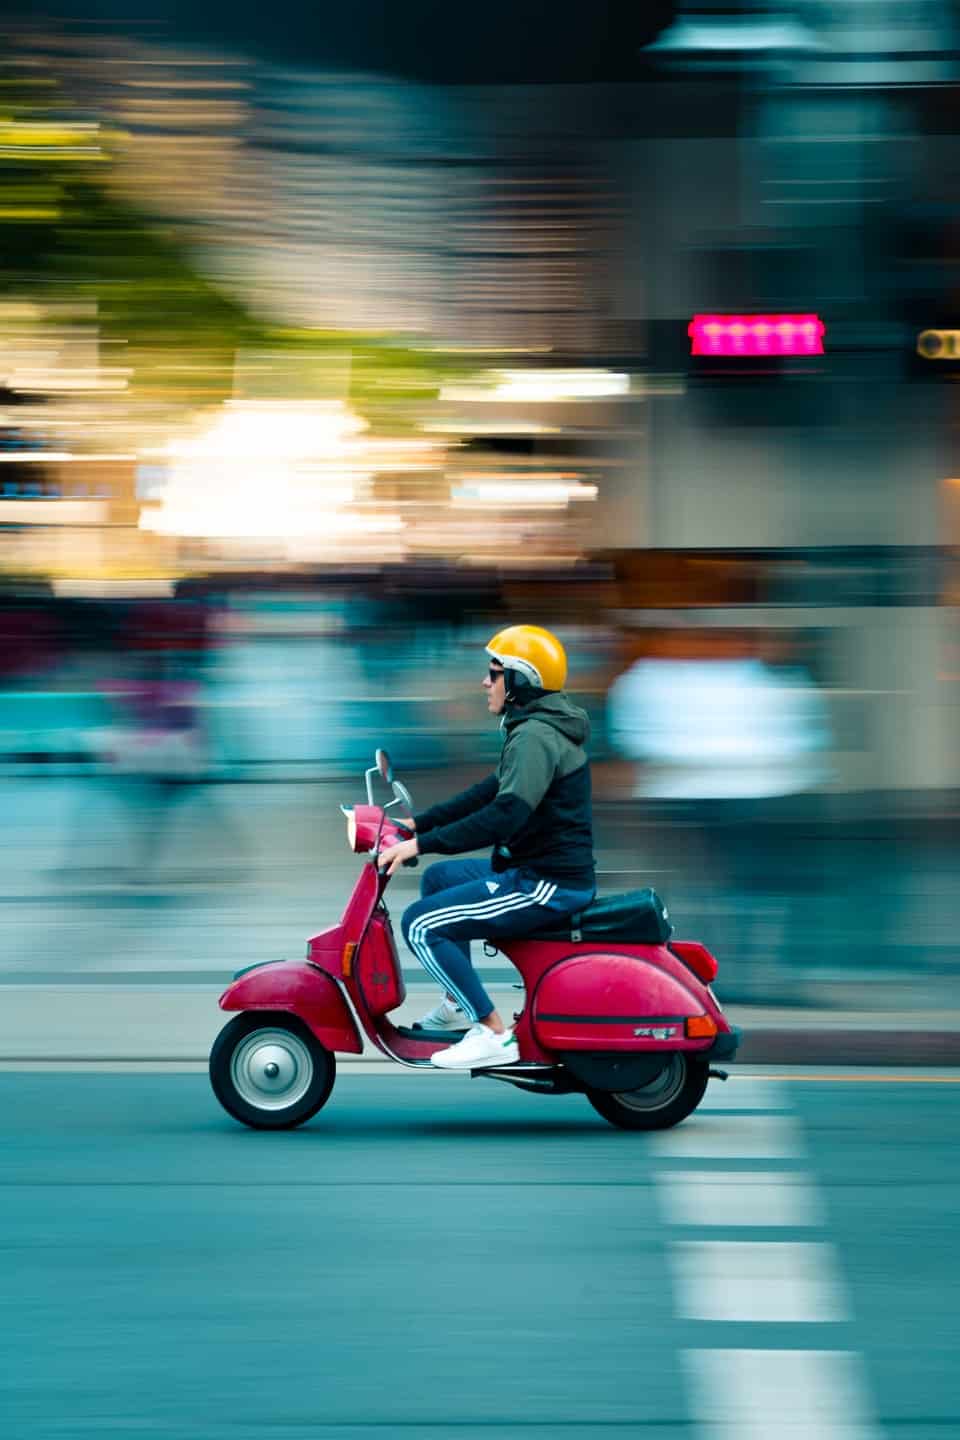
Tracking shot(use a slow enough shutter speed to blur the background but quick enough to freeze the subject while they run)
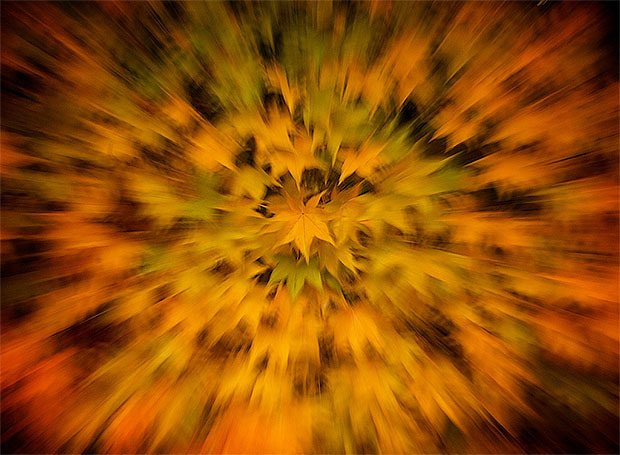
Zoom burst (use a slow shutter speed ~1 sec. focus on an element, press the shutter and zoom out, then repeat and zoom in. How does the image look different?
Carefully set the camera on the ground or a table where it is steady. Use a slow shutter speed and have your partner walk across the image, then repeat with your partner walking away from the camera and towards the camera. How do the images look different? What does the background look like?
Things to keep in mind:
Try to keep the camera as stable as possible
If you are using a really slow shutter speed you might need to go do a place that is darker (inside, under trees)
When doing a tracking shot, keep the subject in the middle of the frame while taking the picture, keep the camera moving while shooting them and take multiple pictures!
When placing the camera on a stable surface, stay right next to it so that it does not get bumped by someone else
Try each shot many times, this is something that takes a lot of practice to get right!
When complete, upload your images to your computer, edit to 8:10 and save as normal. You will need to add a new page to your portfolio which will be titled Shutter Speed Priority. Make edits in photoshop and then upload your photos with the exif data to your website.
Zoom Burst
Tracking Shot
Intentional Camera Movement
Freeze Action
08 - Photoshop challenge 1:
In this challenge you are going to do the following challenges:
Take a picture of a subject and use the adjustments panel to change the colour of their clothes without changing the other colours in the scene.
Replace the sky in a picture of the field with the ceiling of an arena (look online for the image)
Separate a subject from the background, add them to another scene making sure that you balance the colours so that it matches.
Take a picture of your subject with their hand held out, then edit that same subject our of the background smaller, standing in their own hand
Using the puppet warp tool, edit an image of Patrick Stewart to look like an elf. Change his skin tone to a whitish green and try to add a scaly/bumpy texture to his skin. Also, change the colour of his eyes.
Take one of the exterior images of the school and replace the sky with either: the simpsons sky and add simpsons characters to the scene, or an apocalyptic sky with lava raining down. In either scenario, ensure that you adjust the colour tone of the original image to match the same colours as the details that you are adding to the scene. You can find all of the simpsons and apocalytic assets on the internet, make sure that you search for images that are large (greater than 1000 x 1000 pixels).
When complete, add to a new page entitled Photoshop Challenges, Create a title called "Challenge 1" and add the photos with the exif data there. We will add to this page as time goes on.
09 - Elements of Composition:
For this assignment you will create images using your own cellphone camera to demonstrate the different elements of photography that are listed below. When you have completed taking these pictures, upload to your desktop, edit simply to taste and then post them on the Elements page of the website that you made in the first class, and title each one appropriately. Below is the list of required shots: